

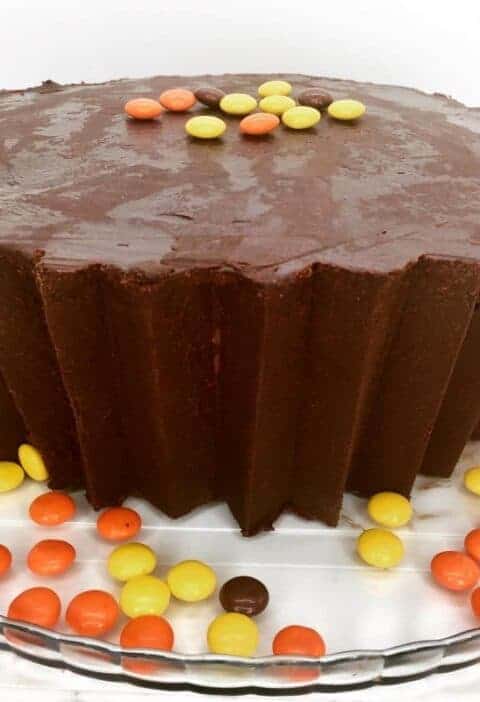
As promised, here is the recipe for the Raspberry Chocolate Cake that I made yesterday. Overall the cake turned out really well! The chocolate cake was flavourful, but not too dense, the raspberry filling was delicious and matched well with the cake and the chocolate ganache drip turned out as I had hoped it would and overall the cake was very pretty.
The only drawback was the buttercream frosting. I prefer frosting that isn’t too sweet and this one turned out a bit sweeter than I would have liked. Though I thought it had a nice raspberry flavour when I tasted it before frosting the cake, paired with the strong chocolate and raspberry flavour from the cake and filling, all I tasted was sweet. I had a bit of frosting left over, so this afternoon I fiddled with it to see if I could make it better. I added 3 different things to combat the sweetness of the icing: more butter, more raspberry powder, and some lemon juice. The lemon juice was the key ingredient. Not only did it balance the sweetness of the sugar, but it augmented the raspberry flavour.
You may be wondering about using raspberry powder versus raspberry puree. I have tried making icing with raspberry puree before and though it had nice colour, the raspberry flavour was lacking with the small amount of puree I was able to put in. You get so much more flavour from raspberry powder, which is made from ground freeze-dried raspberries. If anything, I would substitute in some raspberry puree for the cream for an additional boost to the flavour and colour.
For the chocolate ganache, it is imperative that the ganache be equal parts chocolate and cream by weight, so I have not put volume measurements. The drip can be intimidating but it actually was pretty easy. I am attaching a YouTube video at the bottom that I found to be a helpful tutorials for drip cakes.
I used a few tools and tricks to make the cake look like it did. I’m going to post some tips and descriptions of those methods below the recipe so you don’t have to scroll too far to get to the recipe. I’m not a fan of when I have to scroll forever through a post to see the actual recipe! However I thought I’d place a list some helpful tools I used, for your reference. I am an Amazon associate, so I receive a commission on any items purchased through these links:
- Cake Strips – Helps stop cake doming and promotes flat topped cake layers.
- Wilton Cake Icer Tip #789 – A large piping tip to spread an even layer of icing around the perimeter of your cake
- Wilton 2D Closed Star Tip – This tip pipes out wonderful ruffles that I used to create the roses on top of the cake
- Silicon Piping Bags – Love these reusable bags and they are so easy to clean.
- Revolving Cake Decorating Stand – makes decorating so much easier because you can turn the cake around to meet you instead of having to move around your counter.
- Offset Cake Spatula – essential for spreading icing
- Icing Smoother – The best way to achieve smooth icing
- Plastic Squeeze Bottle – I happened to have these anyway but they made doing the drip icing way easier than trying with a piping bag
- Raspberry Powder – This is a best way to achieve a noticeable raspberry flavour in your icing. It is made from ground freeze-dried raspberries with no added sugar or flavourings.
[recipe title=”Raspberry Chocolate Drip Cake” servings=”8-12″ cooktime=”3 hours” difficulty=”moderate” description=”A delicious chocolate layer cake filled with raspberry filling and topped with raspberry icing and a chocolate ganache drip. The frosting makes enough for the layers and outside of the cake. To make enough for the flowers, increase by 1/4.”]
[recipe-ingredients]
Chocolate Cake
– 4 oz (113 g) unsweetened chocolate, chopped coarsely
– 1/4 cup (3/4 oz/22 g) cocoa powder
– 2 tsp (10 ml) instant espresso powder
– 1/2 cup (118 ml) hot water
– 1 cup (180 gl) packed brown sugar
– 3/4 cup (150 g) granulated sugar, divided
– 1 3/4 cups (8 3/4 oz/248 g) all-purpose flour
– 1 1/2 tsp (9 g) baking soda
– 1 tsp (5 g) salt
– 1 cup (250 ml) buttermilk
– 2 tsp (10 ml) vanilla extract
– 4 large eggs, plus 2 egg yolks, room temperature
– 12 tbsp (340 g) unsalted butter, softened and cut into 12 pieces
Raspberry Filling
– 2 cups (250 g) frozen raspberries
– 6 tbsp (75 g) granulated sugar
– 1/2 tbsp (7.5 ml) lemon juice
– 1/4 cup water, divided
– 2 tbsp (16 g) cornstarch
– 1 tbsp (30 ml) orange liqueur
Raspberry Frosting
– 12 tbsp (340 g) unsalted butter, softened
– 4 1/2 – 5 cups (540 – 600 g) icing sugar
– 4 tbsp (60 ml) raspberry powder (or more to taste)
– 2 tbsp (30 ml) lemon juice
– 2 tbsp (30 ml) heavy cream or raspberry puree
Chocolate Ganache
– 60 g (3 1/2 oz) semi-sweet or bittersweet chocolate
– 60 g (3 1/2 oz) heavy cream
[/recipe-ingredients][recipe-directions]
For the Cake
1. Adjust oven rack to middle position and preheat oven to 350F. Grease three 8-inch (20 cm) round cake pans and line with parchment paper. Then grease the parchment paper and flour pans.
2. Combine chocolate, cocoa, espresso powder and hot water in a medium heatproof bowl or double boiler, set over an inch of barely simmering water. Stir constantly with a rubber spatula until chocolate is melted 1-2 minutes. Then add 1/4 cup (50 g) granulated sugar and cook, stirring until thick and glossy, 1-2 minutes. Remove from heat and set aside to cool.
3. Whisk flour, baking soda and salt together in a medium bowl. Set aside.
4. Combine buttermilk and vanilla in a small bowl. Set aside.
5. Using a stand mixer with the whisk attachment, whip egg and egg yolk on medium speed until combined. Add brown sugar and remaining granulated sugar. Increase speed to high and whip until doubled in volume, about 2-3 minutes.
6. Change from the whisk to the paddle attachement and add cooled chocolate mixture. Mix on medium speed until fully combined, 30 – 45 seconds. Scrape down the bowl.
7. Add butter, one piece at a time, mixing 10 seconds after each addtion.
8. Add flour in 3 additions, alternating with milk in 2 additions, mixing to incorporate between each addition.
9. Remove bowl from mixer and give a final stir by hand, making sure to incorporate anything from the bottom of the bowl that didn’t get mixed in.
10. Divide batter between prepared pans and smooth tops with a rubber spatula.
11. Bake until a toothpick inserted in the centre comes out clean, 18-25 minutes.
12. Let cakes cool in pans on rack for 10 minutes then remove from pans, discard pans and cool completely on racks, about 2 hours.
For the Raspberry Filling
1. Combine raspberries, sugar, lemon juice and 2 tbsp (30 ml) water in a medium saucepan. Bring to a simmer over medium heat, stirring occasionally.
2. Simmer until raspberries completely break down, 5-10 minutes.
3. Pour into a fine mesh strainer (preferably metal), set over a bowl. Using a spoon, stir and press the mixture through the strainer to get as much of the juice into the bowl as possible. Discard the seeds.
4. In a small bowl, whisk together cornstarch and remaining 2 tbsp (30 ml) water.
5. Clean out your saucepan and pour in the raspberry puree and cornstarch mixture. Cook over medium heat until mixture thickens. Stir in orange liqueur.
6. Transfer to a bowl, cover and let cool completely in fridge.
For the Rapsberry Buttercream Frosting
1. In a stand mixer with the paddle attachment, cream butter until light and fluffy, about 2 mintes.
2. Add raspberry powder, lemon juice, cream and 4 1/2 cups sugar. Mix on low speed until sugar is saturated.
3. Increase to high speed and mix on high speed for 2 minutes. You want a spreadable, but not drippy icing. If too thin, add more sugar, 1 tbsp (15 ml) at a time. If too thin add more cream 1 tsp (5 ml) at a time. Use immediately or store in the fridge until ready to use. If storing in the fridge, remove 30 minutes before using.
For Main Assembly
1. Place a dollop of icing on your cake board and then press your first layer on top. This will help to keep your cake from sliding around.
2. Spread 1/2 cup over the cake, making a thicker 1 cm border around the edge of the cake.
3. Spread 1/2 cup raspberry filling in the middle of the cake, leaving a 1 cm border.
4. Top with 2nd cake layer and repeat the icing and filling layer.
5. Top with final cake layer.
6. Spread a thin layer of frosting over the top and around sides of cake. This is the crumb coat and will seal in the cake crumbs so they don’t show through on the outer layer of frosting. Chill in the fridge for 30 minutes to until frosting is hard.
7. Once crumb coat has hardened, coat the entire cake in another layer of frosting. Chill while you make the ganache drip.
For the Chocolate Ganache Drip
1. Combine chopped chocolate and heavy cream in a small bowl.
2. Microwave for 20 seconds then stir.
3. Continue to microwave in 10 second intervals, stirring after each interval, until chocolate is completely incorporated into cream.
4. The ganache will now need to cool slightly. While the ganache cools, take your cake out of the fridge. Stir the ganache intermittently until it starts to thicken slightly. This is the tricky part. You want it cool enough that it won’t run all the way off the cake but not so cool that it will just turn into a blob on the cake. The best way to test is to try dripping some down the side of your bowl. When the drips look right, you are ready to transfer the ganach to either a piping bag or a squeeze bottle and begin your drip.
[/recipe-directions][/recipe]
Cake Decorating Tips:
For even cake layers, weigh your batter as you put it in the pan:
In order to calculate how much batter to put in each pan, I first weighed my mixing bowl when it was empty. Then I weighed it again with the batter in it after I had finished making it and subtracted the weight of the bowl. From that I divided the weight of by batter in three and figured out I needed around 488 grams of batter in each pan. I then put each pan on my scale, balanced it to zero and then put in the batter. Then insured that I had roughly the same amount of batter in each pan, within a few grams. The resulting layers looked pretty uniform.

For flat layers, line your pans with cake strips:
I first discovered these back when I made my Banana Cake with Peanut Butter and Chocolate Frosting. At that time I made my own with damp paper towels and tin foil. You can read about that process in that post. I liked the results so much that I purchased some reusable fabric cake strips. I love these because they are adjustable and will fit around pretty much any size pan. You just soak them in water for about 10 minutes and wrap them around your pans before putting them in the oven.

The strips insulate the sides of the cake, which stops the sides cooking faster than the middle of the cake. This inhibits the dome shape you can get in cakes. It also keeps the sides from drying out and keeps them more tender. Cake strips often cause the cake to take a bit longer to bake, but I have given a time window in the recipe that will account for baking either with or without cake strips.

Before frosting your cake, put a dollop of frosting on your cake board:
This will keep the bottom layer from sliding around and make it easier to decorate.

Also before frosting line your plate with strips of parchment to keep it clean:

A revolving cake stand and offset spatula make frosting your cake much easier:
I love these two pieces of equipment.

If you are putting both frosting and filling between the layers, make the edges of the frosting higher around the circumference of the cake to make a border around the filling:
This will keep the filling from spilling out and will also act as a glue between your layers after it is chilled so the cake doesn’t slide around when you cut it.

For a nicer looking frosting, make sure to do a crumb coat:
This seals in the crumbs so they don’t show on the outside layer of frosting.

This handy piping tips makes it a breeze to put an even layer of frosting around the sides:
Simply pipe the frosting in overlapping strips, then run an offset spatula or cake smoother around the cake to get rid of the seams.

You can use a slightly damp paper towel to make sharper corners around the top of your cake:
I wash my hands then dry them with the piece of paper towel, which makes them the perfect dampness. Preferably this would be paper towels without a pattern on them, as the pattern will transfer. I wasn’t worried about this for my cake, since there was going to be a ganache over top.


[…] with the Raspberry filling that I have used in both my Peanut Butter and Jam Sandwich Cake and my Raspberry Chocolate Drip Cake might work better. I knew that this filling worked well with strong chocolate flavour. I was […]